The better the preparation the better the results
How to prepare for using Action Paint
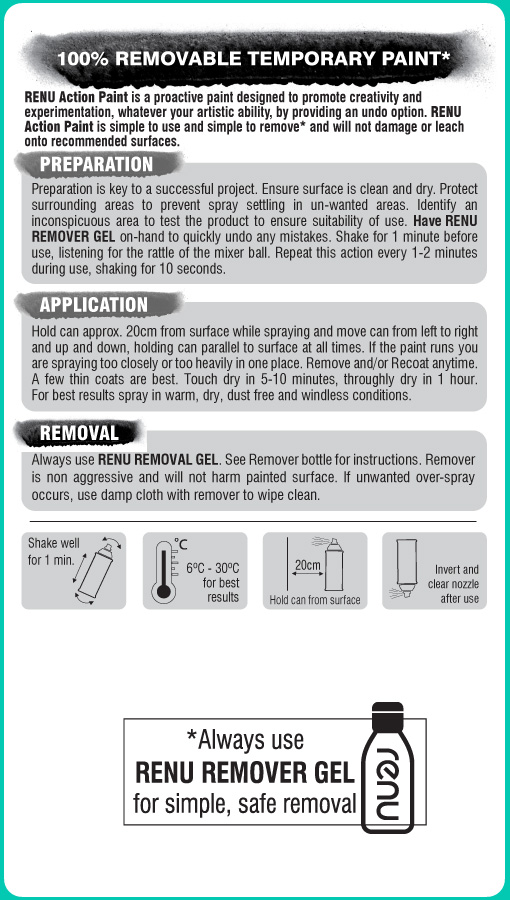
Spray painting with Action Paint is far easier then with traditional spray paints however it is still very important to prepare correctly. It is important to have the right materials and tools to protect your surfaces and your health. You will also need to know how to prepare your item for painting and how to use proper technique to get the best results.

1
Always Read the Instructions
Action Paint is pretty incredible however it is slightly different to traditional paints. Therefore, always read the instructions on the can and the remover.
2
Always do a spot test
Action Paint is designed for Hard, Sealed, non-porous surfaces. We have tested many however it is important to ensure your surface is compatible by doing a quick test on a small area first (Apply & remove).
3
Check that the surface is compatible
Action Paint is designed for sealed non-porous surfaces. If the paint can seep into cracks or porous surfaces then the remover cannot do its job. Always do a test first to be 100% sure.
4
Clean the surface
Always ensure the surface is clean and dry before painting.
5
Mask off area to paint
To avoid overspray (or having to remove too much) then always mask off areas with paper/plastic and a good quality masking tape. Poor quality tape can lead to poor edges.
6
Respect other people property
Action Paint can have some interesting reactions when sprayed on different surfaces but please always check with the owner of the surface before painting!
Below are a series of more detailed instructions on preparing your Action Paint Project.
June 20, 2018
June 20, 2018
remember: you can always UNDO and start again
How to apply Action Paint
One of the great qualities of Action Paint and it's undo option is that it promotes spontaneity and creativity. Therefore, you will find that you paint more often and in different conditions with Action Paint than other paints. To ensure you get the best results then you need to understand how best to apply Action Paint.
1
Shake Shake Shake
You must always give Action paint a good shake to ensure the paint is fully mixed and ready for application. You can never over-shake Action Paint however you can under-shake. Listen to the sound of the ball inside the can and ensure it has a good rattle noise.
2
Have Remover to hand
Mistakes, over spray or just wanting to start again... make sure you have RENU Remover GEL available to quickly and easily remove paint when needed.
3
Good motion
Make sure to slowly sweep the paint across the surface of your project to get an even coat. Don’t aim the nozzle at just one spot.. Also, make sure to overlap each of your passes slightly to ensure that you do not have gaps in between the areas you spray paint.
4
Single Coat
Action Paint has been designed to be a single coating paint. It will perform best if it consists of as thin a coating as possible. Thick coats run the risk for drips and also make removal more difficult.
5
Quick Dry
Action Paint is extremely quick drying. So long as you don't paint too heavy a coating it is touch dry in 5-10 minutes. We do recommend to give the paint 24 hours dry time before exposure to harsh weather if possible. Should water spotting occur then this can be polished out.
6
Over spray
Action Paint makes painting simple. If you get over spray then quickly apply remover gel to remove. Simple. Should you get paint on clothing then immediately soak in remover and wash.

Below are a series of more detailed instructions on applying your Action Paint.
June 20, 2018
Remember: the longer you can leave the remover on - the easier to remove
How to remove Action Paint
While Action Paints has lots of fantastic qualities - the most fantastic is its ability to be removed. As with all projects, you need to prepare for removal. This section will give instructions and tips on the best way to remove.

1
Don't be shy
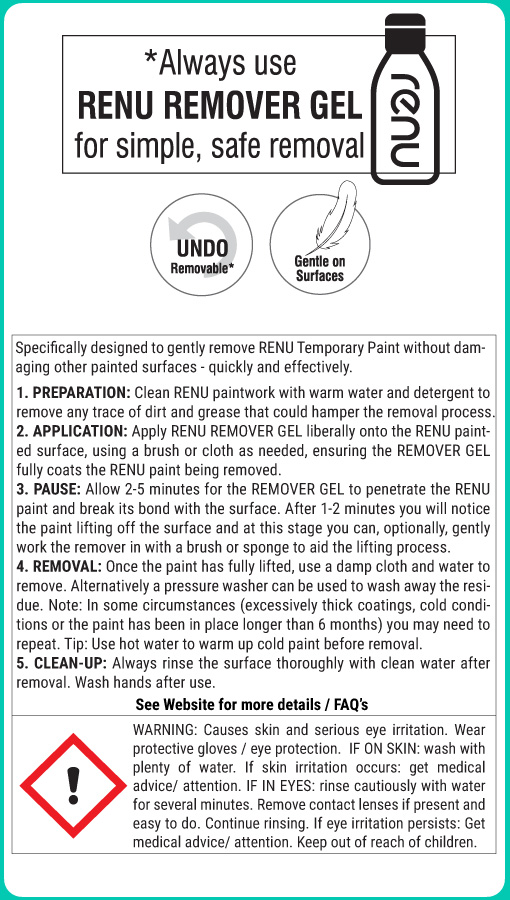
Apply Renu Remover GEL liberally... and ensure the remover stays in contact with the paint. This allows the remover to do its job.
2
Clean surface
It is good practice to give the paint being removed a quick wash with warm water. This will give the remover the best opportunity to work its magic.
3
Patience
The longer you leave the remover on the paint being removed the easier the removal will be. On cold days or if the paint has been on for longer than 6 months you may need to leave the remover on for a bit longer. After a short while you should notice the paint lifting from the surface. At this stage you can optionally use a brush or cloth to gently work the remover into the paint.
4
Disposal
In our opinion, after the remover has disabled the Action Paint, it can be disposed of in mains drains. However, as always, please consult with your local authority before doing so.
Once removed, Action Paint will not reform as paint and will wash away naturally with rain.
5
Jet Wash
Use of a jet wash to remove large painted projects can greatly speed up removal. It is important to give the remover enough time to penetrate the paint however once you see the paint lifting form the surface then a jet washer can be used.
6
Repeat if required
The ease of removal is quite spectacular considering how durable Action paint is. However, with thick applications or cold conditions you may need to repeat the removal process a few times. This is normal.
Below are a series of more detailed instructions on removing your Action Paint.
September 19, 2018
June 20, 2018


